The Oracle Integration Cloud (OIC) Agent is a lightweight, stateless runtime that we can setup on own on-premises and cloud infrastructure where direct connectivity is not possible. It acts as a communication bridge between our Oracle Integration instance in the cloud and on-premises applications and systems. The agent also enables secure communication and data transfer between the cloud and our local/other cloud environments. Refer to link for more details.
Configure Oracle OIC Agent secure communication between on-premises systems and Oracle Cloud, enabling seamless data integration and automation for optimized business processes and enhanced agility. Setting up an agent in Oracle Integration Cloud typically involves the following steps:
Login to Oracle OIC and Create an Agent
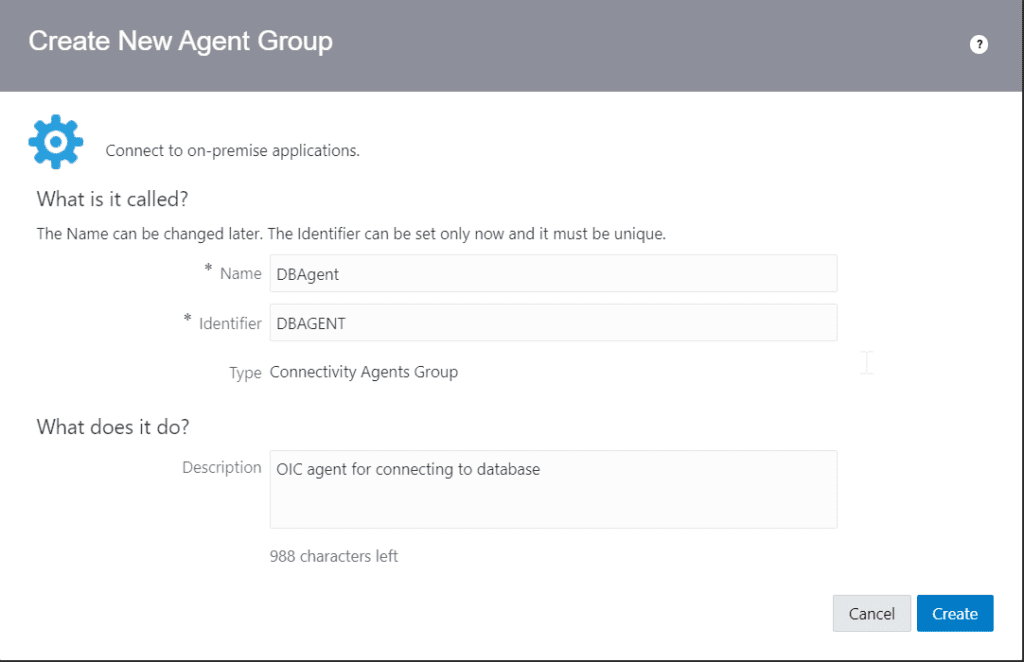
After logging into Oracle Integration Cloud Console, navigate to Integration and then “Agents” section. This is where we manage and configure agents. Create a new agent if you haven’t already. Provide necessary details such as the agent name, description, and choose the appropriate agent group as follows. We shall connect our Oracle database to OIC with the help this agent.

Download, Install and Configure Oracle OIC Agent
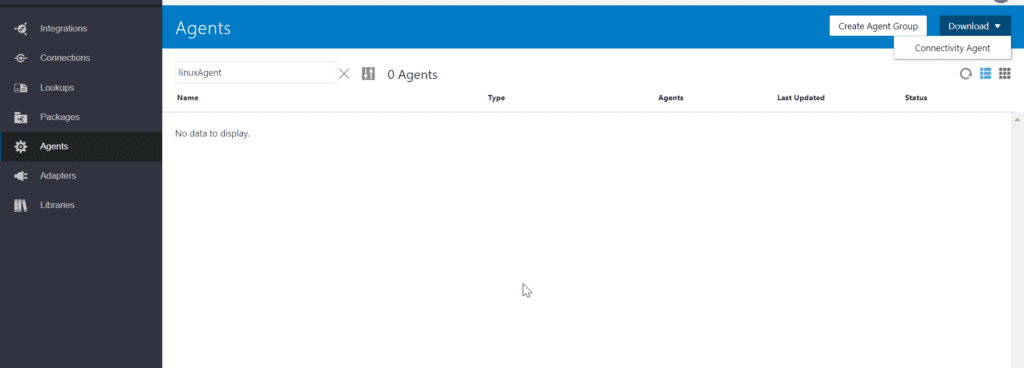
After creating the agent, you usually need to download the agent software. This software needs to be installed on the machine where you want the agent to run.

Please note if you are setting up agent on linux, download the agent installer to a Linux environment directly and do not transfer it from a Windows environment e.g. using winscp (even with binary option) etc. since agent startup might get failed. If you can access Oracle Integration user interface from Linux environment, use the download install option provided on the Agents page otherwise use the following REST command to download the installer:
curl -k -v -X GET 'https://OIC_URL:443/icsapis/v1/agent/binaries/connectivity' -u OIC_user:OIC_password  -H 'Content-Type:application/json'
-O download_location/oic_connectivity_agent.zip
Unzip the downloaded agent software on the target machine and configure the InstallerProfile.cfg by entering OIC_URL and agent group identifier (refer to create agent screen for identifier above).

Start the Agent and Verify
Once our agent is configured, we can now start it on the target machine. This allows the agent to establish communication with Oracle Integration Cloud. Please make sure java is added in the environment path. Use following command to start the agent. Enter the OIC username and password when prompted. You can also verify from agents page in OIC whether the agent is connected.
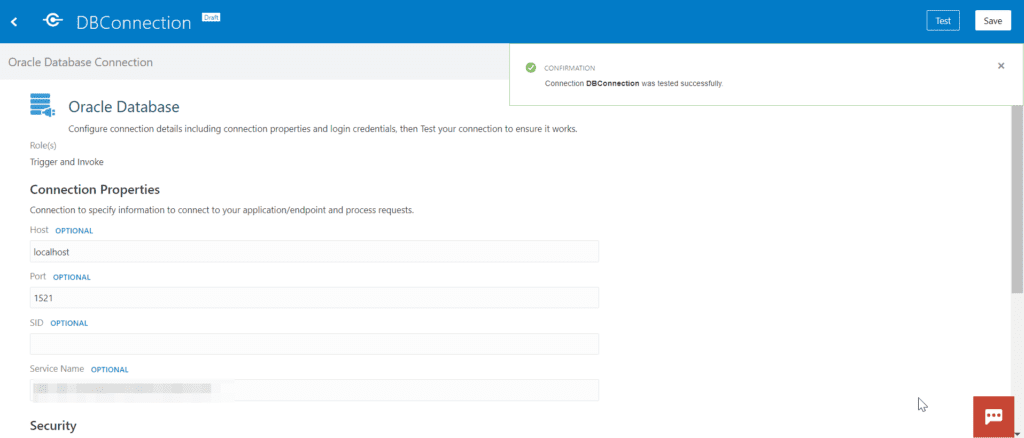
java -jar connectivityagent.jarIn order to the agent, we will create a Oracle database connection in OIC and connect to DB using our newly defined agent as follows

We can now even use localhost for database node since agent is running locally on this node. However, we also need to attach agent group (as shown below) to this connection since OIC will use it while talking to the database.

2 thoughts on “How to Setup Oracle OIC Agent”